Fleur Baby Blanket

Fleur Baby Blanket by poppyandbliss.com

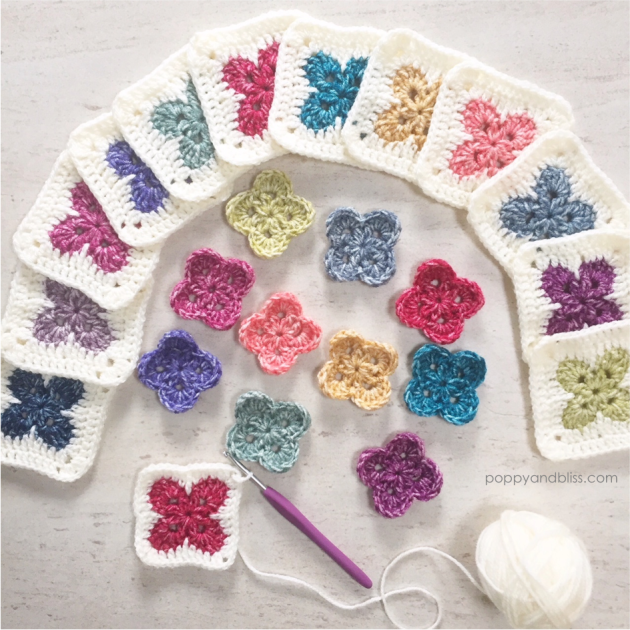
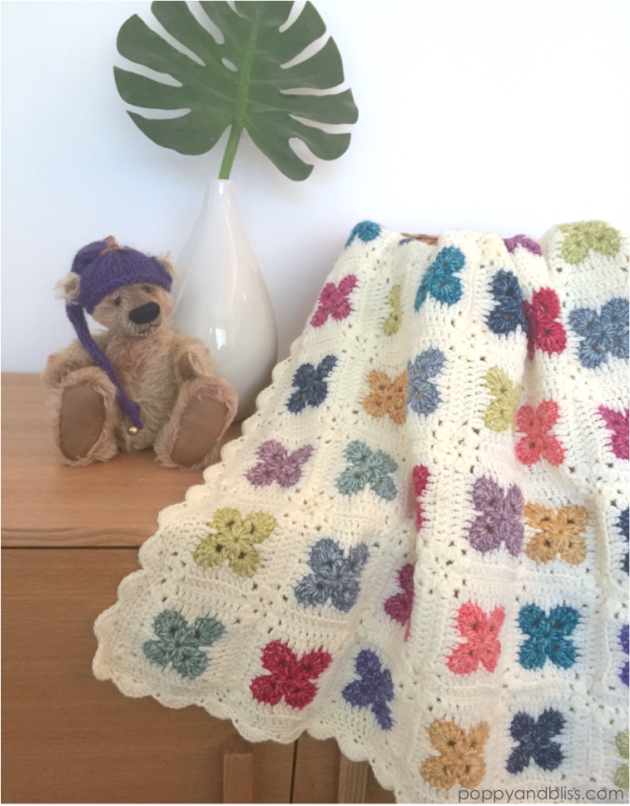
It’s been 4 years since I posted the pattern for my Fleur Motif (see the original here)  I really love this simple little motif and I’ve been wanting to make a baby blanket with it ever since.

Fleur Baby Blanket by poppyandbliss.com

I made a start on it last year then got a little distracted with moving into our new house but pulled it out again when my daughter announced that she will be bringing a little bundle of joy into the world in August.  Yikes!  I’m going to be a granny!  I’m far too young of course 😉 but I’m super excited to meet my little granddaughter soon.

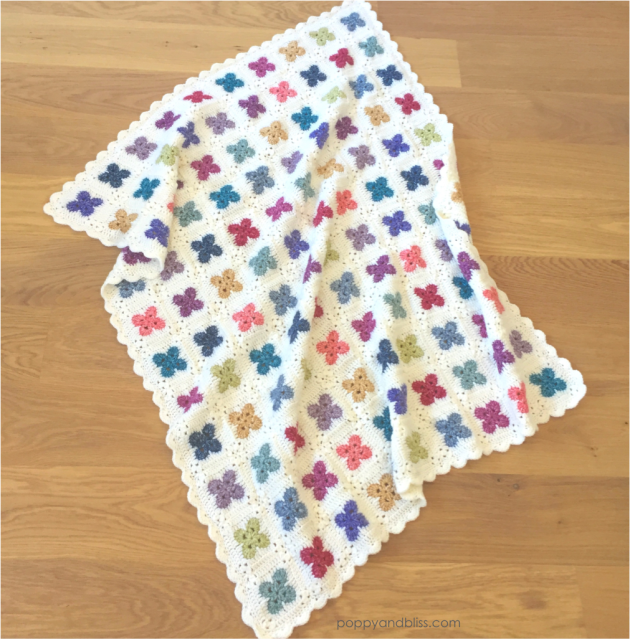
I’ve made some improvements to the original with a few tweaks and written up the new pattern for the complete blanket, including full written instructions and charts, joining instructions, colour layout, yarn information and it has been fully tested.

Fleur Baby Blanket by poppyandbliss.com

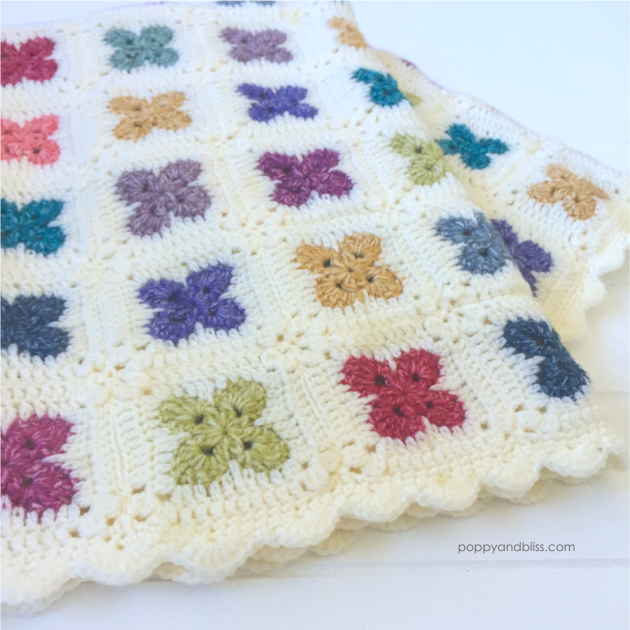
Can you spot the little flowers that have formed where the squares meet?  I love this detail!

Fleur Baby Blanket by poppyandbliss.com

I just love how it has turned out!

The free version of the original unmodified motif is still available here or if you prefer the full updated pattern for the modified motif and instructions to make the whole blanket in either US or UK/Aus terms is available for a small fee of AU$2.99 (aprox US$2.00) and can be found in my stores:

 Ravelry:   both US and UK/AU terms are in the one download

Etsy:   US Terms   UK/AU terms

Love Crochet:  US Terms   UK/AU Terms

Until next time, happy hooking!

Michelle x


Vivo Throw – a new pattern


vivo throw pattern by poppyandbliss.com

Hooray it’s new pattern day!

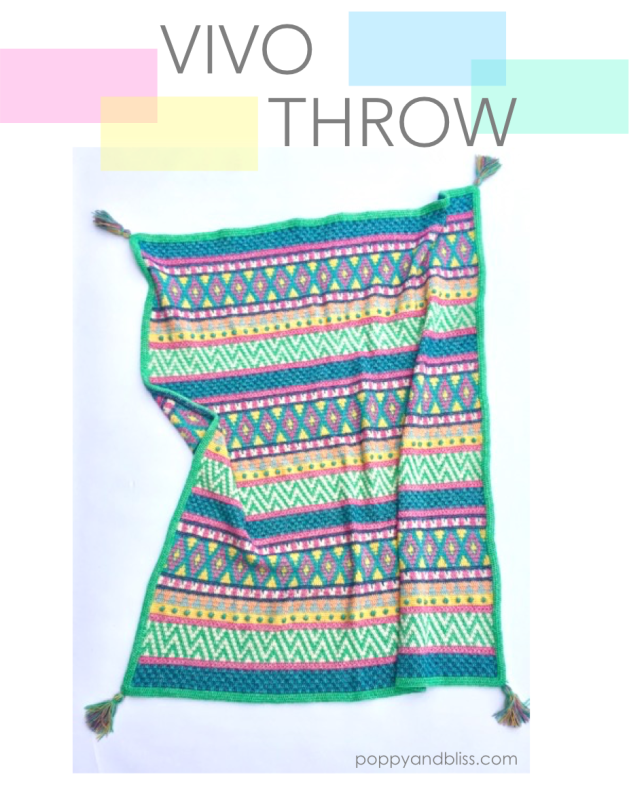
Do you remember my Vivo bolster cushion from a couple of years ago now?  Well, she now has a matching throw!

As soon as I finished the cushion I wanted to make a blanket version but then the idea got put on hold for awhile …. then life stuff got in the way …. then I actually made the blanket (a whole year ago now)  ….. then life stuff got in the way … again! …. but now here we are and I’m relieved to finally tick this one off the list and release the pattern into the world!

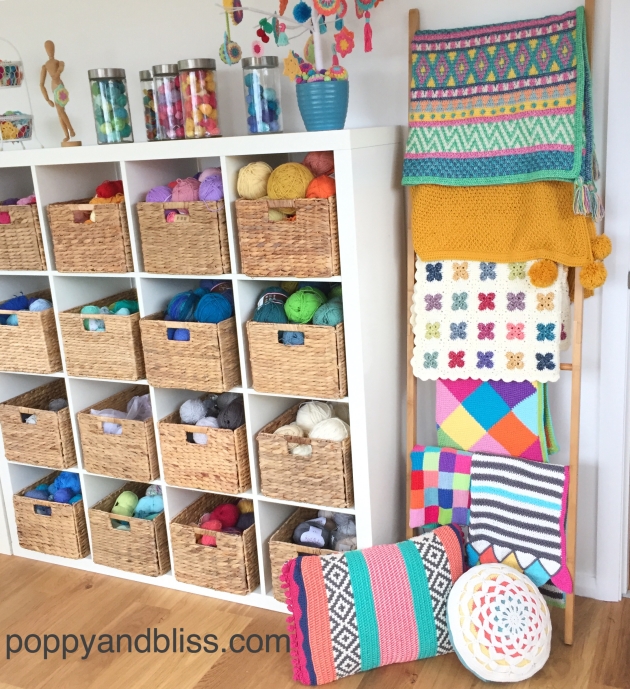
craft roomHere she is sitting at the top of the ‘to do list’ aka the ‘ladder of shame’ in my new craft room in my new house… one of the life things that got in the way of writing up the pattern.  Building houses and crochet pattern writing don’t mix well together I’ve found!

Now that we’ve settled into our new place though there is no excuse not to get the patterns written up for everything else hanging there glaring at me accusingly 😉 Stay tuned for these!

In the meantime, let’s get back to Vivo…

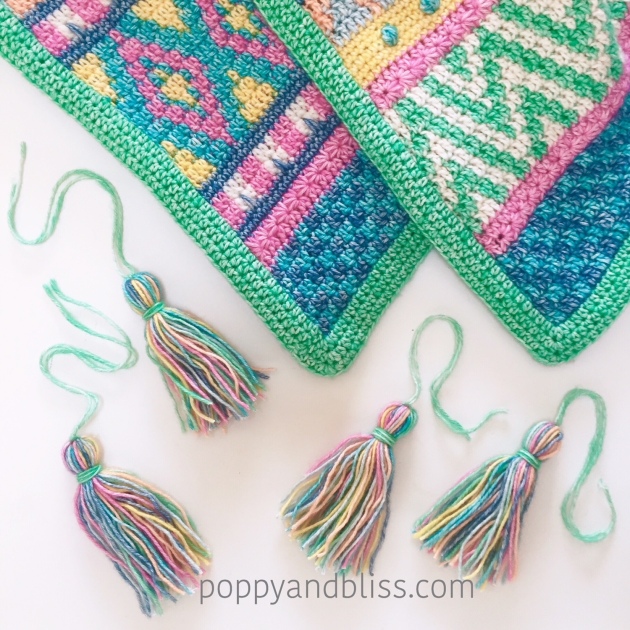
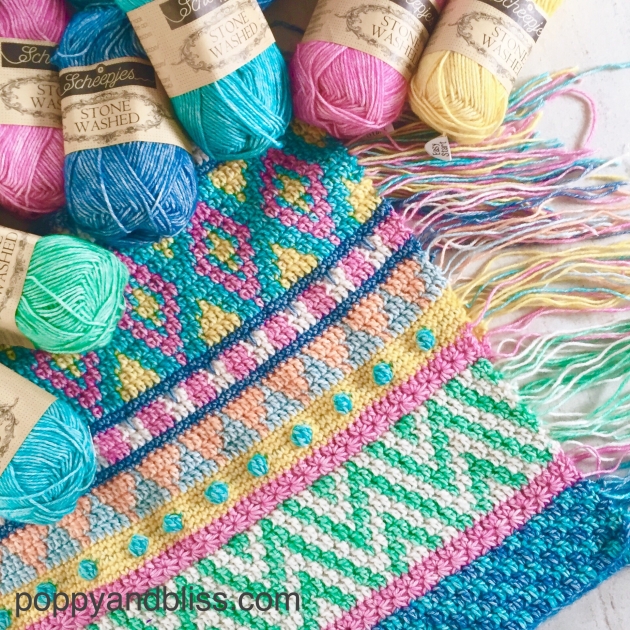
vivo throw crochet pattern by poppy and blissJust like the cushion version, the blanket is created using tapestry crochet and textured stitches to create the designs. The pattern is rated as intermediate, mainly for all the colour changes but it is not as complicated as it looks using only basic stitches and each design element is set out in strips with easy to follow short pattern repeats for each section.vivo throw crochet pattern by poppy and blissDon’t be put off by all those ends!  With a little bit of magic and a little bit of cheating we’ll deal with those pesky bits without any weaving in.

The pattern also includes a quick guide to tapestry crochet, photo tutorials for the special stitches used and full colour charts for each design.

There are two versions of the pattern available. One written in US terms and one using UK/Aus terms.

You can find the pattern here:

Ravelry   Both US & UK versions are included in download 

Etsy    US Version     UK Version

Love Crochet  US Version   UK Version

Remember sharing is caring.  If you make your very own Vivo Throw don’t forget to show us all your beautiful creation by tagging your pics with #vivothrow or add your project to the Vivo Throw Ravelry page.

I hope you enjoy.


Until next time Michelle x


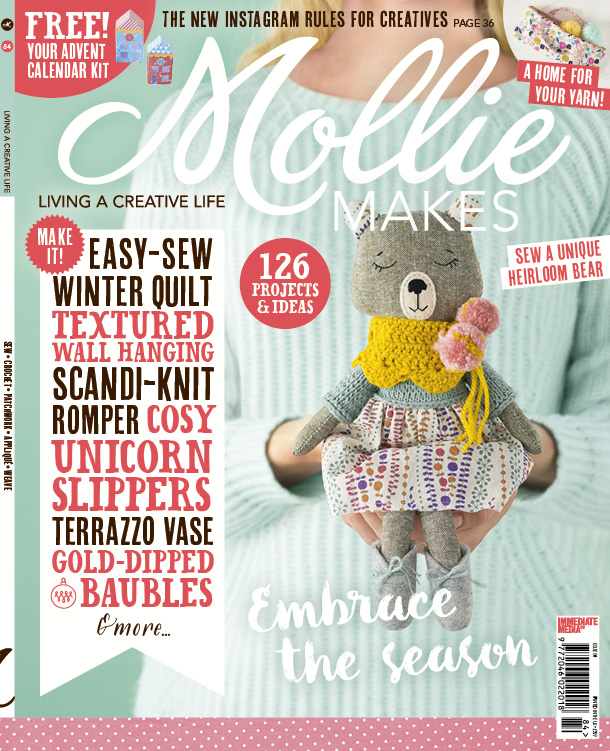
Herringbone Cushion Pattern in Mollie Makes Issue 84

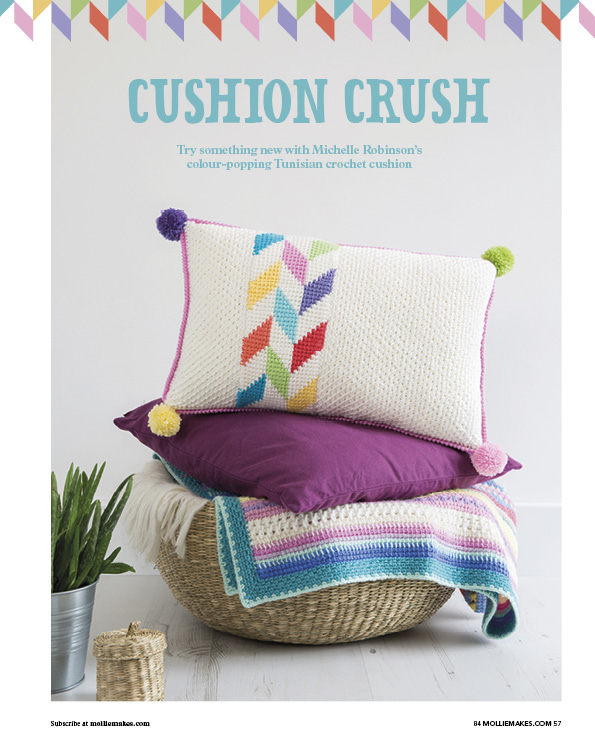
Herringbone Cushion pattern - Mollie Makes issue 84I was pleasantly surprised to discover the Herringbone Cushion pattern from my Tunisian Crochet Workshop book is reprinted in the latest issue of Mollie Makes (issue 84).  How exciting!

Herringbone Cushion pattern - Mollie Makes issue 84

This latest issue is out now in the UK.  I’m not sure when it will be available here in Australia or elsewhere but the digital version is available on the links below:

Apple – https://itunes.apple.com/gb/app/mollie-makes/id911319779?mt=8

Google Play – https://play.google.com/store/newsstand/details/Mollie_Makes?id=CAowr9LnAw

Until next time

Michelle x


Vivo Bolster Cushion Pattern

vivo_wmark

Hooray it’s new pattern day! I’m excited to introduce my Vivo bolster cushion pattern to you today.   She’s bold, she’s colourful and so much fun to have in your home.

I’m so happy with how this pattern has turned out and hope you will love her as much as I do.

Getting Vivo ready for the world has been a slow process though. I actually finished making the cushion several months ago but I must admit to a tiny bit of procrastination when it came to writing up the actual pattern. But it’s all done now and back from the testers ready to go.

Vivo_white_wmark

Inspired by the colourful ethnic textiles from around the world, this stunning cushion is created using tapestry crochet and textured stitches to create the designs.

The pattern is rated as intermediate, mainly for all the colour changes but it is not as complicated as it looks using only basic stitches and each design element is set out in strips with easy to follow short pattern repeats for each section.

Vivo_end_wmark

The pattern also includes a quick guide to tapestry crochet, photo tutorials for the special stitches used and full colour charts for all the different design strips as well as smaller charts for just the pattern repeats to save you going cross-eyed working from the whole chart.

There are two versions of the pattern available. One written in US terms and one using UK/Aus terms and can be found in all the usual places :

 Etsy:   US Terms       UK/Aus Terms

Love Crochet:   US Terms     UK/Aus Terms

Ravelry:          Here   (Ravelry will only allow one listing per design so your download will include both versions of the pattern as 2 separate files. You will only need to print the one you need)

I hope you enjoy.

Until next time

Michelle x

Tunisian Feathers Free Pattern

free pattern for Tunisian crochet feathers

Hello Hello

I’m back on my little blog after being MIA for almost a year!  Yikes, that year slipped by!  I’ve been a busy girl in that time and wrote a book. Yep, a book!   I’m so excited and very proud with how it’s turned out but I can’t say much more for now except to say that it will be released later this year and I will pop back with more details soon.  I can’t wait to share!

In the meantime, here’s a free pattern for you.  I’ve been having so much fun making these feathers.  They’re easy and quick to make and easily achievable with only just the basic knowledge of Tunisian crochet.

** You can get the free pattern below or purchase the ad-free printable PDF for $2 in my Ravelry, Etsy or LoveCrochet shops **

I hope you will have as much fun as I have making your own pretty feathers.  Enjoy

Tunisian crochet feathers free pattern

TUNISIAN FEATHERS

Abbreviations:

ch        chain

M1tb   Make 1 – top bar

Tss     Tunisian Simple Stitch

lp/s     loop/s

sl st    slip st

yo        yarn over

st/s     stitch/es

Special Stitches and Techniques Used:

End st:  The last stitch of the forward pass is treated a little differently than the rest of the stitches in your row.  To make an end st, insert hook under the last vertical and the bar lying directly behind it (2 lps on hook), yo and draw up lp (1 lp back on hook & end stitch made)

endst_txt

M1tb (make 1 – top bar): insert hook under top loop of horizontal bar before next st, yo, pull up loop and leave on hook (1 extra stitch made)

Tss3tog: insert hook under next 3 sts, yo and pull up loop (1 loop on hook)

Finished Size:         

Large Feather = 17 cm

Small Feather = 13 cm

You will need:

  • 5mm crochet hook without handle (pop a rubber band on the end to keep your stitches from falling off)
  • DK/8ply cotton in at least 2 colours

PATTERN:

Large Feather

Pattern notes:

  1. The following instructions are for the design pictured above (the little guy sitting out on his own) but you can go to town with as many colours as you like (or could be bothered weaving in the ends of ), mix up the stripe sequence as you please. There are so many possibilities! Check out the photos throughout this post for inspiration.
  2. To clarify that the last stitch of the forward pass is worked differently, I always refer to this stitch in my patterns as an ‘end stitch’
  3.  Carry yarn between rows if there is only a few rows between colour changes.  If there are more than a few rows, then it’s best to cut yarn and rejoin.
  4. As you work, you will notice that your feather starts to lean to one side a little. That’s a good thing! This will give your feather a nice natural shape

Foundation row: Using Colour A, ch 11. Starting from 2nd ch from hook, pick up a loop from the * top loop only of chain and in each ch to end (11 lps). Return

* a nicer edge is achieved for this design by working into the top loop instead of working from the usual back bump.

 Row 2: M1tb, Tss 3, Tss3tog, Tss 3, M1tb, work end st (11 lps). Return

 Row 3: Work as for Row 2, changing to Colour B on the last 2 lps of return

 Row 4: Continuing with Colour B, work as for Row 2, changing to Colour A on the last 2 lps of return

 Row 5: Continuing with Colour A, work as for Row 2, changing to Colour B on the last 2 lps of return

Row 6: Continuing with Colour B, work as for Row 2, changing to Colour A on the last 2 lps of return

Rows 7 – 10: Continuing with Colour A, work as for Row 2

Row 11: Work as for Row 2, changing to Colour B on the last 2 lps of return

Row 12: Continuing with Colour B, work as for Row 2, changing to Colour A on the last 2 lps of return

Row 13: Continuing with Colour A, Tss 3, Tss3tog, Tss 3, work end st (9 lps). Return changing to Colour B on the last 2 lps

Row 14: Continuing with Colour B, M1tb, Tss 2, Tss3tog, Tss 2, M1tb, work end st (9 lps), changing to Colour A on the last 2 lps of return

Rows 15 – 17: Continuing with Colour A, M1tb, Tss 2, Tss3tog, Tss 2, M1tb, work end st (9 lps). Return

Row 18: Tss 2, Tss3tog, Tss 2, work end st (7 lps). Return

Row 19: M1tb, Tss 1, Tss3tog, Tss 1, M1tb, work end st (7 lps). Return

Row 20: Tss 1, Tss3tog, Tss 1, work end st (5 lps). Return

Row 21: Tss3tog, work end st (3 lps). Return: – draw yarn through all 3 lps on hook. Ch 6, sl st back down along chain. Fasten off.

Weave in ends

———————————————————————————————————————————–

Small Feather:

Pattern note:  The following pattern doesn’t include colour change instructions.

Foundation row: Ch 9. Starting from 2nd ch from hook, pick up a loop from the * top loop only of chain and in each ch to end (9 lps). Return

Rows 2 – 10: M1tb, Tss 2, Tss3tog, Tss 2, M1tb, work end st (9 lps). Return

Row 11: Tss 2, Tss3tog, Tss 2, work end st (7 lps). Return

Rows 12 – 13: M1tb, Tss 1, Tss3tog, Tss 1, M1tb, work end st (7 lps). Return

Row 14: Tss 1, Tss3tog, Tss 1, work end st (5 lps). Return

Row 15: Tss3tog, work end st (3 lps). Return: – draw yarn through all 3 lps on hook. Ch 6, sl st back down along chain. Fasten off.

Weave in ends

Tip:  You can also make your feather in a single colour and embroider your designs on later

Tunisian crochet feathers free pattern

There are no rules here. I’ve mainly used long stitches following the natural slant of the crochet rows and the occasional loopy stitch (I’m no embroiderer). You could also weave your yarn under the vertical bars for another interesting effect. Have fun experimenting!

Now that you’re addicted to making feathers. There are so many ways you can use them to decorate all sorts of things …

Tunisian crochet feathers free pattern

Make a dreamcatcher inspired wall hanging  – add beads, charms, pom poms, lace and ribbon if you like

Tunisian crochet feathers free patternDangle them off a basket or bag

Tunisian crochet feathers free pattern

they make great bookmarks too

These are just a few ideas.  Here’s some more to spark your imagination…

  • String them along a crochet chain for a feather garland
  • Attach them to a woven wall hanging
  • Attach one to your keyring
  • Use them as an applique motif on blankets, clothing, cushions ..
  • Frame one or two and hang them on a wall
  • Use them as gift toppers
  • Make greeting cards – Stick one on a blank card with double sided tape
  • Make a necklace

What will you make?

Until next time

Michelle x


p.s. edit:  Thank you everyone for the overwhelming love this post has received.  There has been lots of requests for the mandala to make the dreamcatcher and also for a video tutorial for the feathers.  

In answer to your requests – I’m very sorry but I won’t be doing a video for this free pattern.  

I will publish the mandala pattern at a later date but for now I am busy with other commitments and won’t have time just yet.  

Thank you for understanding.

Copyright:

Please respect my rights as the designer of this pattern.  This pattern may not be reproduced in any way for distribution, sale or for teaching purposes.

Tunisian Sunset – a new pattern

tunisiansunset_main

Hooray!  I’ve finally finished writing up the pattern for my new blanket – Tunisian Sunset.  Isn’t she pretty!

tunisiansunset_wip1

If you follow me on instagram you would’ve seen her in the making and I just loved every colourful minute of making this one.  All those pretty sunset-ty colours just make my heart sing and dream of happy sunny places far far away.

TunisianSunset_horizon

Would you like to make one too?  Well, the good news is that you can.  I’ve just popped the pattern up in my etsy and ravelry stores.  To celebrate my excitement of getting through the boring writing bit, you can get yours at 30% off for the next 48 hours only.  Use the code earlybird30 to receive your discount (offer ends Friday 10 June 3pm AEST)

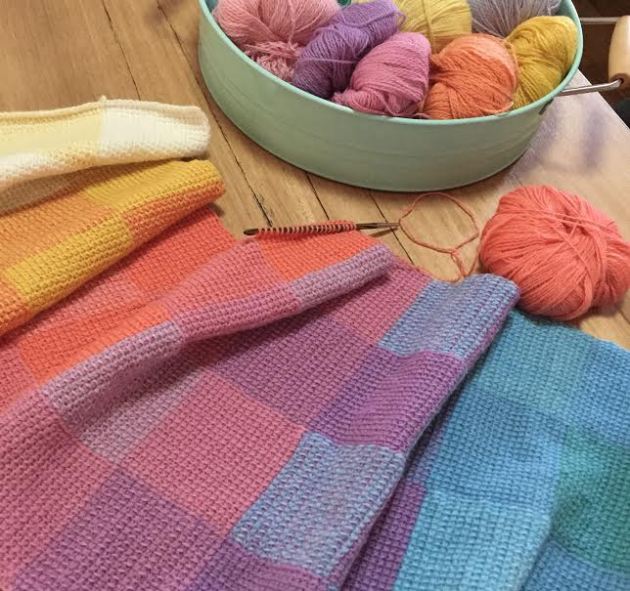
It’s quite an easy make – using only Tunisian Simple stitch and a clever, almost invisible join-as-you go technique.  It’s also the perfect project to pick up in your spare moments and complete a square here and there and before you know it, you’ll have a finished blanket.

Oh! and it’s a great pattern for stash-busting too.  Here’s another version I’m working on using up all my bit’s and bobs of DK yarn.  The squares are slightly smaller in this one but the technique is the same ..

stashbuster

If you’ve never tried Tunisian crochet before but would love to have a go at making this blanket (go on … you know you want to 😉 , I have a tutorial on how to do Tunisian Simple Stitch over here at My Poppet blog.  Once you’ve mastered this stitch you’re good to go and will have found a new craft addiction too!

TunisianSunset_closeup

Until next time

Michelle x

Merry-Go-Round: 1 Motif – 2 Ways

merrygoround_group_logo

You may remember me showing you this pattern that I was working on way back here.

Well that was January and now it’s almost the end of April!  Once again time has flown out the door and this almost finished pattern has sat glaring at me ever since.  Mainly because I wasn’t sure what I wanted to do with it …. hexi or square …. cushion or blanket … this or that …

So enough with the muddled over-thinking!  I give it to you as is and you can choose what you would like to make.  Hexi or Square it’s up to you (or you could even make just the circle and use it as a pretty little embellishment or even a garland…)

OK let’s make stuff!

Merry_Go_Round_logo

Merry-Go-Round Pattern:

I’ve written out the patterns in both US terms and UK/AUS terms.  Find the version you’re familiar with and lets get hookin…

Also – I haven’t had this pattern tested externally so please do let me know if you spot any errors.  Edit – 3/5/16: there was a small error in round 2 which has now been fixed.  

Size:  9 cm

What You’ll Need:

  • 4mm hook
  • 8ply/DK yarn:  I’ve used Cascade Ultra Pima cotton in Sunshine, Honeysuckle, China Pink and Cool Mint but any yarn will do.

Colour Combinations:

With just 4 colours you can get at least 24 different colour combinations.   I’ve used the same colour in Rounds 1 & 6 giving you even more (don’t ask me to do the math – too hard! 😉 .  Check out this site  for a great formula for creating unique colour combo’s.

Abbreviations:

US Terms used (UK in brackets)

ch                chain

dc (tr)         double crochet (treble crochet)

sc (dc)         single crochet (double crochet)

sl st              slip stitch

sp/s             space/s           

yo                 yarn over

Special Stitches:  

US Terms / (UK/AUS in brackets)

2-dc (tr) Cluster stitch: Work first half of a dc (tr) as normal but before the last yo (2 loops on hook), yo and insert back into same st, yo, pull loop through (4 loops on hook), yo, pull through first 2 loops on hook (3 loops on hook), yo, pull through all 3 loops (stitch made)

Note : the first cluster st in a round will be worked differently. Instructions are given within the pattern for this first st then follow the above instructions for all subsequent stitches

Long DC (tr): Worked the same as a regular dc (tr) but into a stitch further down in the previous round. Keep your tension on the looser side and draw the stitch up so that it is even with the rest of the stitches in current round.

Popcorn: Work 3 dc (tr) into same stitch, drop the loop off your hook and re-insert hook under the top 2 loops of the first dc (tr) in the group, grab the dropped loop with your hook and pull back through the stitch, ch 1 to secure.

tute_collage

Pattern – US TERMS:

SQUARE

Start:   Make a magic circle or ch 4 and join with a sl st to form a ring

Round 1:  Using Colour A, ch 3 (counts as first dc), 11 dc into ring. Join with a sl st and into top of beginning ch-3. Fasten off (12 dc)

Round 2:  Join Colour B, ch 2 (counts as 1st partial dc), yo and insert hook back into same st, yo, pull loop through (3 loops on hook), yo, pull through first 2 loops on hook (2 loops on hook), yo, pull through  2 loops (first 2-dc Cluster stitch made), ch 1, * 2-dc cluster, ch 1. Repeat from * into each st to end. Join with a sl st into top of first cluster and fasten off (12 x 2-dc clusters)

Round 3:  Join Colour C into top of first cluster st of previous round, ch 1, sc into same st, make a long dc into the base of the same cluster st, *sc into top of next cluster st, long dc into base of same cluster st . Repeat from * to end   Join with a sl st into top of first sc and fasten off.

Round 4:  Join Colour D into top of first long dc from previous round, ch 1, sc into same st, make a popcorn in the next st , * sc in next st, popcorn in next st. Repeat from * to end.       Join with a sl st into first sc and fasten off.

Round 5:  Join Colour A into the first sc between popcorns of previous round, ch 1, sc into same st, ch 3, * sc into next st between popcorns, ch 3. Repeat from * to end. Join with a sl st into first sc. Don’t break off yarn. * if you’re making a hexi scroll down to Hexi instructions for Round 6.

Round 6:  Sl st into first ch space, [ch 3 (counts as first dc), 2 dc, ch 2, 3 dc] into same sp, 3 dc into next two spaces, * [3 dc, ch 2 , 3 dc] into next sp, 3 dc into next two spaces. Repeat from * to end (4 corners & 2 sets of 3 dc between). Join with a sl st into top of beginning ch-3 and fasten off.

Round 7:  Join White into any corner sp, [ch 3 (counts as first dc), 1 dc, ch 1, 2 dc] into same sp, dc into next 12 sts, * [2dc, ch 1, 2 dc] into corner sp, dc into next 12 sts. Repeat from * to end. Join with a sl st into beginning ch-3. Fasten off and weave in ends.
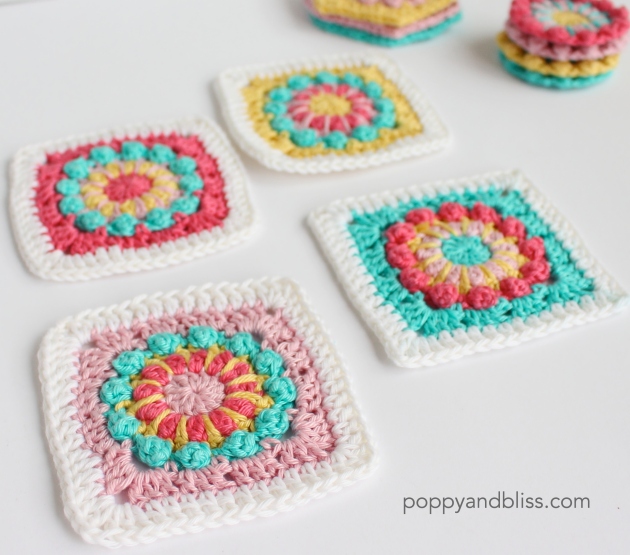
HEXI:

Rounds 1 – 5:  Work as for square

Round 6: Sl st into first ch space, [ch 3 (counts as first dc), 2 dc, ch 2 , 3 dc] into same sp, 3 dc into next sp, * [3 dc, ch 2 , 3 dc] into next sp, 3 dc into next sp. Repeat from * to end (6 corners & 1 set of 3 dc between). Join with a sl st into top of beginning ch-3 and fasten off.

– – – – – – – – – – – – – – – – – – – – – – – – – – – – – – – – – – – – – – – –

Pattern – UK/AUS TERMS:

SQUARE

Start:   Make a magic circle or ch 4 and join with a sl st to form a ring

Round 1:  Using Colour A, ch 3 (counts as first tr), 11 tr into ring. Join with a sl st and into top of beginning ch-3. Fasten off (12 tr)

Round 2:  Join Colour B, ch 2 (counts as 1st partial tr), yo and insert hook back into same st, yo, pull loop through (3 loops on hook), yo, pull through first 2 loops on hook (2 loops on hook), yo, pull through 2 loops (first 2-tr Cluster stitch made), ch 1, * 2-tr cluster, ch 1. Repeat from * into each st to end. Join with a sl st into top of first cluster and fasten off (12 x 2-tr clusters)

Round 3:  Join Colour C into top of first cluster st of previous round, ch 1, dc into same st, make a long tr into the base of the same cluster st, * dc into top of next cluster st, long tr into base of same cluster st . Repeat from * to end   Join with a sl st into top of first dc and fasten off.

Round 4:  Join Colour D into top of first long tr from previous round, ch 1, dc into same st, make a popcorn in the next st , * dc in next st, popcorn in next st. Repeat from * to end.       Join with a sl st into first dc and fasten off.

Round 5:  Join Colour A into the first dc between popcorns of previous round, ch 1, dc into same st, ch 3, * dc into next st between popcorns, ch 3. Repeat from * to end. Join with a sl st into first dc. Don’t break off yarn.* if you’re making a hexi scroll down to Hexi instructions for Round 6.

Round 6:  Sl st into first ch space, [ch 3 (counts as first tr), 2 tr, ch 2 , 3 tr] into same sp, 3 tr into next two spaces, * [3 tr, ch 2 , 3 tr] into next sp, 3 tr into next two spaces. Repeat from * to end (4 corners & 2 sets of 3 tr between). Join with a sl st into top of beginning ch-3 and fasten off.

Round 7:  Join White into any corner sp, [ch 3 (counts as first tr), 1 tr, ch 1, 2 tr] into same sp, tr into next 12 sts, * [2tr, ch 1, 2 tr] into corner sp, tr into next 12 sts. Repeat from * to end. Join with a sl st into beginning ch-3. Fasten off and weave in ends.

merrygoround_squares_side_logo

HEXI:

Rounds 1 – 5:  Work as for square

Round 6: Sl st into first ch space, [ch 3 (counts as first tr), 2 tr, ch 2 , 3 tr] into same sp, 3 tr into next sp, * [3 tr, ch 2 , 3 tr] into next sp, 3 tr into next sp. Repeat from * to end (6 corners & 1 set of 3 tr between). Join with a sl st into top of beginning ch-3 and fasten off.

merrygoround_hexi_side_logo

I hope you’ll enjoy making these sweet motifs.

Until next time

Michelle x


Pegboard Baskets – free pattern

pegboardbasket_poppyandbliss_txt

I was given some Ribbon XL yarn to try some time ago by the lovely Gwen from Hoooked and have finally had the chance to have a little play with it.

I’m on an organising kick at the moment and needed some pretty storage solutions to control my mess (ahem … creativity 😉 so these handy little  baskets were just the thing I needed and are the perfect size for storing all your bits and bobs.  I’m hanging mine on my pegboard but they can be hung anywhere you like.

Made in my favourite stitch, the Linen Stitch, which gives them a wonderful woven texture.  I’ve included instructions for a basket with a contrast band around the top or you can change colour in any round to make your basket your own.

 What you’ll need:

  • 6.mm hook
  • Ribbon XL yarn – I’ve used  Mint Green and Sweet Pink.  (I’ve only used 1/2 skein of each colour to make 3 baskets so there’s plenty left over)

US Terms Used (UK terms in brackets)

Abbreviations:

ch:  chain

pm:   place marker

sc (dc):   single crochet (double crochet)

sk:    skip

st/s:  stitch/es

ss:   slip stitch

yo:  yarn over

Pattern:

Worked in spiral rounds. Place marker in first st of each round, moving marker up as you go.

 Base:

Round 1:  Make a magic ring  (or ch 4 and join with a ss).  6 sc (dc) into ring

Round 2:  2 sc (dc) into each st to end (12 sc (dc) )

Round 3:  * 1 sc (dc), 2 sc (dc) into next st. Repeat from * to end ( 18 sc (dc) )

Round 4:  * 2 sc (dc), 2 sc (dc) into next st. Repeat from * to end ( 24 sc (dc) )

Round 5:  * 3 sc (dc), 2 sc (dc) into next st. Repeat from * to end ( 30 sc (dc) )

 Sides:

Round 6:   sc (dc) into first st, * ch 1, sk next st, sc (dc) into next st. Repeat from * to last st, sc into last st

Round 7:  sc (dc) into first st, * ch 1, sc (dc) into next ch sp. Repeat from * to end.

Rounds 8 – 10:  Work as for Round 7. Change colour at the end of Round 10 (when you have 2 loops left on your hook for the last st, yo with new colour and pull through to complete st).  Fasten off main colour.

Rounds 11 – 13:  Continuing on in contrast colour, work as for Round 7. (Linen stitch pattern ends after Round 13)

Round 14:  ss into first st, Ch 5, skip next 4 sps and sts (2 sps and 2 sts), sc (dc) into next st, sc (dc) into each sp and st to end

Handle:  5 sc (dc) over ch sts from previous round, join with a ss into next sc (dc) of previous round. Fasten off and weave in ends.

Happy hooking!

Michelle x


Crochet Ribbon Christmas Tree Pattern

ChristmasTree_NewHello friends 🙂

Can you believe it’s nearly Christmas !?  Nope.  Me either!  My head is still firmly stuck way back in June somewhere and I’m not at all ready to start thinking about Turduckens or Christmas cheer.

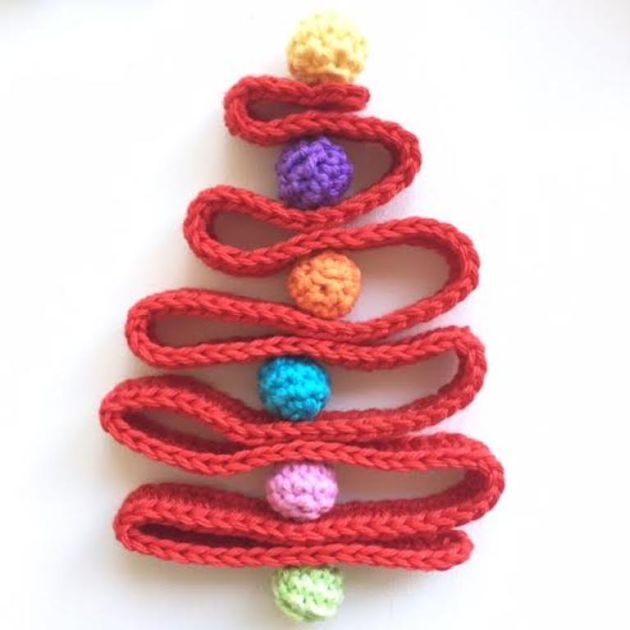
Despite my un-christmasy mood,  I’ve put together a quick and easy pattern for you to deck your halls (or tree).

So without further ado here ’tis…

Crochet Ribbon Christmas Tree

Edit:  You can now get an ad free, print friendly version here on: Ravelry | Etsy |Love Crochet

Finished size: 13 cm

What you’ll need:

  • 3 mm hook
  • Small amounts 8 ply/DK cotton yarn. I’ve used various brands from my stash but a stiffer cotton works better than a soft cotton for these.
  • Aprox 13g for the tree
  • Aprox 3 g each in 6 different colours for the baubles
  • Yarn needle

Tip:  You can use any weight yarn for these but they will turn out a different size.  Use a hook smaller than you normally would for your yarn so that your work is nice and firm.

US Terms Used (UK/Aus terms in brackets)

Abbreviations:

ch –               chain

sc (dc) –      single crochet (double crochet)

hdc (htr) – half double crochet (half treble)

ss –              slip stitch

Pattern

Tree – Make 1

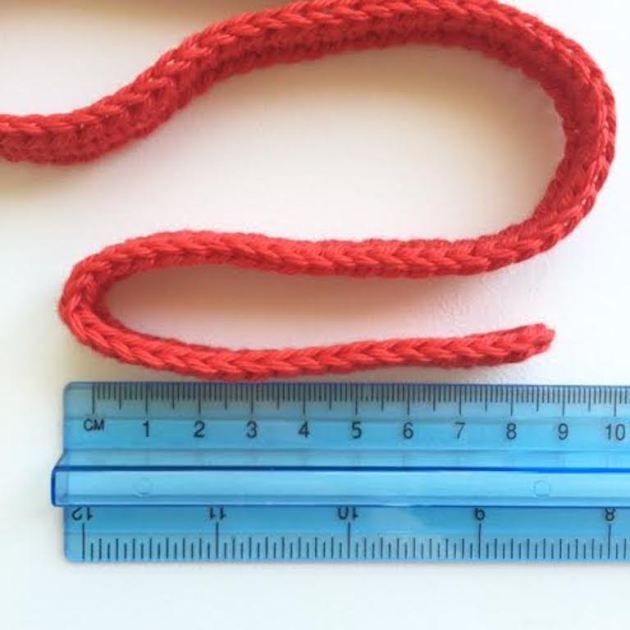
Foundation row: Ch 182

Row 1:  Hdc (htr) into 3rd ch from hook, hdc (htr) up to last ch, 5 hdc (htr) into last ch

Row 2: Turn work upside down and work into bottom loop of ch, hdc (htr) up to last st, 4 hdc (htr) into last st. Join with a ss into top of beginning ch-2.  Fasten off and weave ends in.

Baubles – make 6

Worked in spiral rounds

Start:  Leaving a long tail (about an arms length) to be used for stuffing later, make a magic circle

Round 1:  working into ring, ch 1 (not counted as a st), 6 sc (dc)

Round 2:  2 sc (dc) into each st (12 sc/dc)

Round 3:  12 sc (dc)

Round 4:  * skip one st, sc (dc) into next st.  Repeat from * 5 more times, stopping half way to insert stuffing (roll long yarn tail into a rough ball shape and squish into half closed ball.  Use the blunt end of your hook to help push it all in before you finish closing).  Join with a ss.

Fasten off and bury yarn end back up through centre of ball.  Clip closely.

Assembly:

tree_1

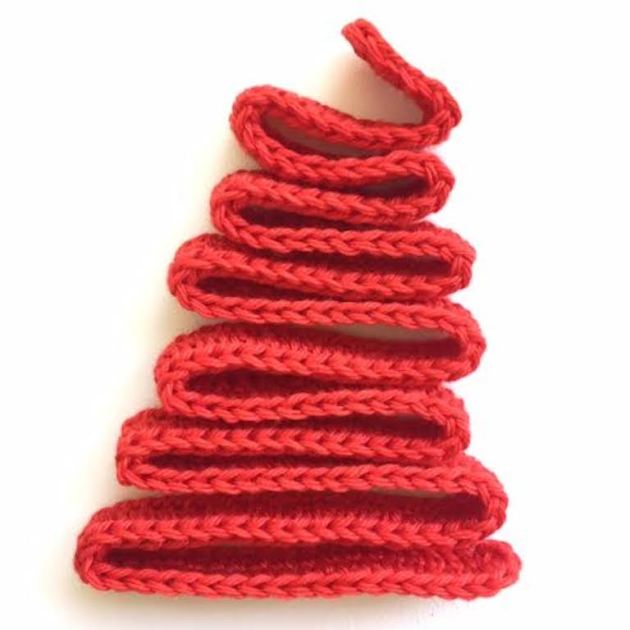
Step 1:  Lay your tree piece out on a flat surface and fold end back aprox 8.5 cm

tree_2

Step 2:  Keep folding up, making each fold slightly shorter than the last until it looks something like this

tree_3

Step 3:  Place your first bauble at the base of your tree and continue up, placing baubles between 2 layers of each fold (see pic). You’ll probably have to fiddle a bit to get your folds looking right (and will need to fiddle even more when you start sewing in a minute)

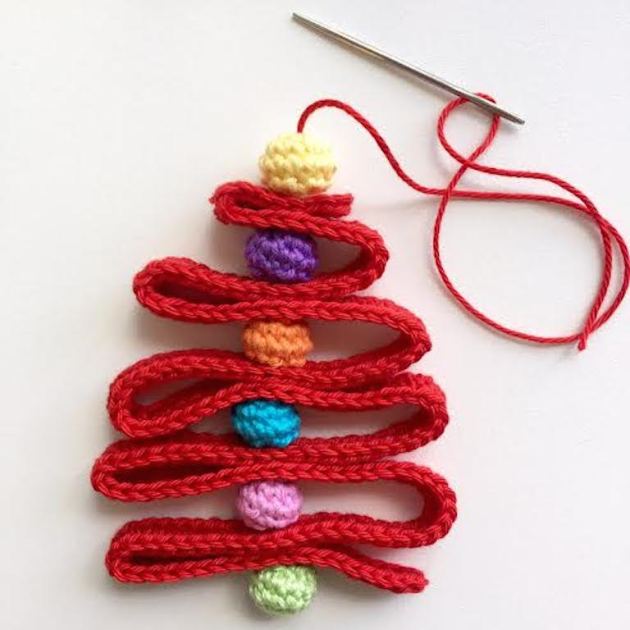
When you’re happy with your tree shape, thread your needle with a length of yarn aprox 40 cm, using the colour of your choice (this will also become the hanging loop)

tree_4

Step 4:  Starting with the bottom bauble, secure your thread with a couple of small stitches in the centre top of the bauble (you won’t see this as this side will rest up against the bottom of the tree)

tree_5

Step 5:  Take your needle up through the first layers, pick up your next bauble and run needle up through the centre and then through the next set of layers.

Continue joining together this way until all baubles are attached.tree_6

Step 6:  Give the tail end a little tug to tighten (don’t pull too hard or you’ll squish your baubles out of shape).

tree_7

Step 7:  Make a hanging loop with the remaining yarn by going back down through the centre of the top bauble and make a few small stitches into the bottom of the bauble and the top layer of the tree to secure.

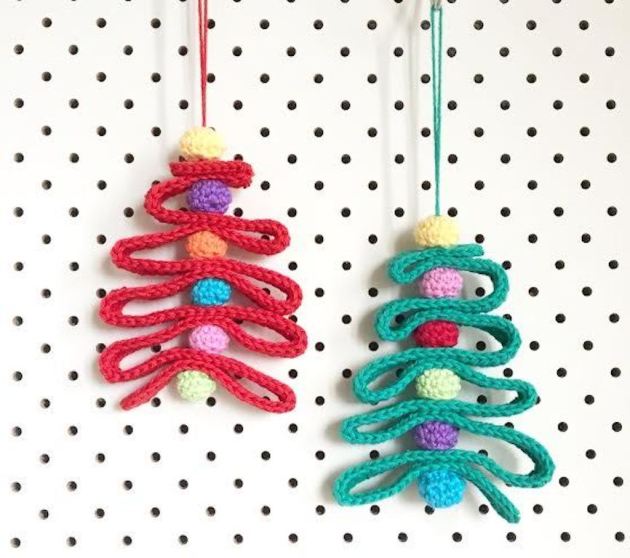
Give your tree a little ‘foof’ and hang for everyone to admire.

christmastreebypoppyandbliss_1

Until next time

Michelle x

Festiva pattern and a creative challenge

festiva_header

Hi there

As promised last week, I’m back with a creative challenge and a ‘pattern of sorts’, or as I prefer to think of it, a ‘recipe’.  I’m calling it a recipe rather than a new pattern as it’s nothing new, just a standard solid granny square to which I’ve added other elements (also nothing new) to give it a little twist.

festiva_wip_watermark

Here’s where the creative challenge comes in; I’ve written out the instructions for just the square but I want to encourage you to then make it your own by adding your own special touches.

Let your imagination run wild with this.  Use up all your scraps, play with colours, make it a riot of colour or monochromatic, make it smaller or bigger, try out a new border, use your favourite joining method to make a blanket, a bag, a cushion, a coat or even a thingy-ma-jig.

This is not a competition but a fun exercise to get your creative juices flowing.  Let go of all expectations, try something you normally wouldn’t and see where it takes you.  Sometimes the most pleasant surprises come from not overthinking a project, not worrying about using exactly the same yarn as the designer or not fussing about colour placement.

Festiva_fin_watermark

I’ve deliberately not thought too much about mine and the whole point of starting my project was to use up all my scrappy bits of yarn (didn’t work btw – I seem to have just as many, if not more now :).  I didn’t worry about colours going together but just used whatever I happened to pick up next. Admittedly, I’m not fond of some of the colour combo’s but in the whole scheme of things it all just works so I’m letting go of my usual fussiness here.

Ok, let’s get started!

festiva1_watermark

What you’ll need (for one square) :   

  • Small amounts of yarn in 4-5 different colours.  It doesn’t matter what type of yarn you use as long as it’s all the same weight.  I’ve used 8ply/Dk for mine
  • Yarn for main colour.  I’ve used off-white
  • 4mm hook (or size suitable for your yarn)

Abbreviations – US Terms Used (UK/AUS terms in brackets)

ch:          Chain

dc (tr):  Double crochet (treble crochet)

sc (dc):  Single crochet (double crochet)

sl st:       Slip stitch

sp:          Space

Instructions:

Start:        Using Colour 1, make a magic circle or ch 3 and join with a sl st to form a circle

Round 1:  Ch 5 (counts as first dc (tr) + 2 ch throughout).  [3 dc (tr) into ring, ch 2] 3 times.  2 dc (tr) into ring, join with a sl st into 3rd ch of starting ch.  Break off yarn.

Round 2:    Join Colour 2 into any corner sp with a sl st.  Ch 5, 2 dc (tr) into same sp.  *Dc (tr) into next 3 sts, [2 dc (tr), ch 2, 2 dc (tr)] into corner sp. Repeat from * twice, dc (tr) into next 3 sts, 1 dc (tr) into first sp.  Join with a sl st into 3rd ch of starting ch.  Break off yarn.

Round 3:   Join Colour 3 into any corner sp with a sl st.  Ch 5, 2 dc (tr) into same sp.  *Dc (tr) into next 7 sts, [2 dc (tr), ch 2, 2 dc (tr)] into corner sp. Repeat from * twice, dc (tr) into next 7 sts, 1 dc (tr) into first sp.  Join with a sl st into 3rd ch of starting ch.  Break off yarn.

Round 4:   Join Colour 4 into any corner sp with a sl st  Ch 5, 2 dc (tr) into same sp.  *Dc  (tr) into next 11 sts, [2 dc (tr), ch 2, 2 dc (tr)] into corner sp. Repeat from * twice, dc (tr) into next 11 sts, 1 dc(tr) into first sp.  Join with a sl st into 3rd ch of starting ch.  Break off yarn.

Round 5:  Join new colour (can be a new colour or one already used ) into any corner sp.  [1 sc (dc), ch 3, 1 sc (dc)] into same space, *ch 2, skip one st, sc (dc) into next st.  Repeat from * to next corner sp, [1 sc (dc), ch 3, 1 sc (dc)] into corner sp.  Repeat this sequence to end.  Join with a sl st into top of first sc (dc).  Break off yarn.

Round 6:  Join Main colour into any corner loop, Ch 5, 2 dc (tr) into same sp * 2 dc (tr) into each loop space up to next corner, [2 dc (tr), ch 2, 2 dc (tr)] into corner sp. Repeat from * twice, 2 dc (tr) into each loop space up to starting corner (first sp), 1 dc (tr) into first sp.  Join with a sl st into 3rd ch of starting ch.  Break off yarn.

** On a side note, although they are perfectly fine for this square, I don’t use Ch3 as my first st or sl st at the end, but replace these with a faux st or invisible join.  I’ll be back soon with a tute for both of these techniques.

Now let the fun times roll, here’s where you get to put your special touch to this square.  Use your favourite joining method and border to make it your own.

I’ve joined mine with the join-as-you-go method for my blanket but I’m making some more squares for a cushion and will be joining them with different coloured rows of sc (dc).

festiva_join

and carried on the block st pattern (rounds 5 & 6) in the border and added a picot edge.  I’m very tempted to add pom poms too!

festiva_border

and because it’s impossible to take a good photo on this dark and dreary day today, here’s a crap photo of my finished Festiva blanket trying to look casually styled on the couch …

festiva_fin1


I hope you enjoy making Festiva.   I’d love to see your fab creations so be sure to tag them with #festivasquare on instagram or pop a pic up in my Ravelry group if you prefer. I’d love to see them!

Until next time

Michelle x